

Pre-sales customer service WeChat


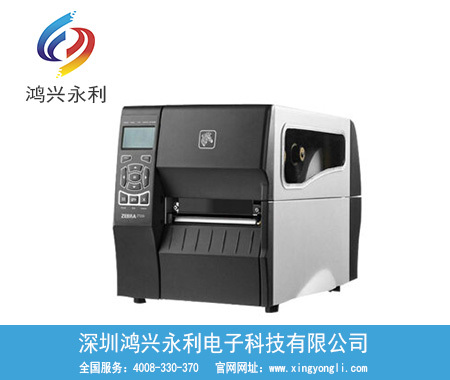
Zebra ZT230 barcode printer setting method
Release Time:2020-07-10
Zebra ZT230 barcode printer setting method: 1. Handle the barcode printer, 2. Select the location for the barcode printer, 3. Select the data communication interface, 4. Connect the printer power supply, 5. Select the print mode, 6. Load the ribbon, 7. Load the media. When operating the zebra ZT230 printer, pay attention to keep the barcode printer itself from being damaged.
Zebra ZT230 Barcode Printer Processing
Unpack and inspect printer
Upon receipt of the barcode printer, immediately unpack and check for damage during transportation.
· Preserve all packaging materials.
· Check all external surfaces for damage.
· Raise the media door and check the components in the media compartment for damage.
If shipping damage is found during the inspection:
· The transport company shall be notified immediately and a breakage report shall be submitted.
· Keep all packaging materials for inspection by the shipping company.
· Notify your authorized Zebra distributor
Store Printer
If you will not put the printer into use immediately, you should repackage it with the original packaging materials. You can store the printer under certain conditions:
· Temperature:-40 to 600C (-400F to 1400F)
Relative humidity: 5% to 85% non-condensing
Shipping Printer
If you need to transport the printer:
• Power off (O) the printer and disconnect all cables.
• Remove media, ribbon, or any other loose items from inside the printer.
• Turn off the print head.
· Carefully load the printer into the original box or other suitable box to avoid damage during transportation.
Shipping crates can be purchased from Zebra if the original crates are damaged or missing.
Select a location for the printer
Choose a location for your printer that meets the following requirements:
Desktop: The desktop on which the printer is placed must be stable, strong, and have sufficient size and strength to support printing
machine.
Space: The area where the printer is placed must have enough heat dissipation space, and it should also be convenient for the printer components and connections.
To ensure adequate ventilation and cooling, leave sufficient open space around the printer.
Caution · Do not place any padding and cushioning material under or behind the printer, as this will obstruct air flow
and cause the printer to overheat.
Select data communication connection
Connect the printer to the printer using one or more of the available connections. j≯ j shows the standard connection method. Your
The printer may also have ZebraNet wired or wireless print server option or a parallel port.
Figure 8. Communication interface
Zebra GX430t Print Test (Printer Configuration) Label
1. Make sure that the media is installed correctly and the printer top cover is closed. If the printer is not already powered on, turn the power on. If the printer status indicator is flashing green during initialization (pause mode), press the Feed button once to set the printer in Ready mode.
2. Press the Feed button two or three times to have the printer perform calibration based on the loaded media. During this process, the printer may feed multiple sheets of label paper.
3. While the status indicator continues to be green, press and hold the "Paper Feed" button until the status indicator flashes once.
4. Release the Feed button. A configuration label will be printed.
Zebra GX430t pre-installed Windows®Printer Driver
Zebra changed the installation method to use the printer through the Windows operating system of the PC-based system. We recommend pre-installing at least ZebraDesigner™Windows®driver to take advantage of its ease of use, as well as Windows XP®Windows the convenience of the operating system after the SP2 version.
Connecting the Zebra GX430t Printer to a Computer
Zebra®G-Series™The printer supports a variety of different interface options and configurations. These include: Universal Serial Bus (USB) interface, RS232 serial interface, parallel interface (IEEE 1284.4) and 100 Ethernet.
• USB, Serial and Parallel
• Optional accessories: USB, serial and Ethernet (wired)
• Optional accessories: USB, serial and wireless WiFi Ethernet with LCD screen
• Optional accessories: USB, serial and Bluetooth with LCD screen
After connecting the printer
Test printing using the Zebra Setup Utility:
1. 打开 Zebra Setup Utility。
2. Click the icon for the newly installed printer, select the printer and enable the printer configuration button under the printer in the window.
3. Click the 'Open Printer Tools' button.
4. In the 'Print' tab window, click the 'Print configuration label' row and click the 'Send' button. The printer prints a configuration status label.
Extended reading:
Barcode printer common small problems easily solved
What is the reason why the barcode printer is blurred
Zebra GX430t replacement print head method
Dear customer, thank you for visiting our website. I am very happy to serve you!
Shenzhen Hongxing Yongli Company upholds the determination to carry out the bar code to the end! One-stop supply of major brands of barcode scanners, barcode printers, data collectors and other barcode hardware and software equipment. provide scanning gun setup questions answered free of charge, barcode printer driver software download, barcode management system applications in different industries. National unified service consultation: 4008-330-370
Focus on us
Official Account
Pre Sales
After Sales
National Service Hotline
Complaint suggestion:+86 13530144755
Enterprise E-mail:wanglili@xingyongli.com
Links:Shenzhen Hongxing Yongli Electronic Technology Co., Ltd.(Apply for friend chain plus QQ:2355671558)
©2024 Shenzhen Hongxing Yongli Electronic Technology Co., Ltd Powered by www.300.cn